SketchRay Tutorials > Artistically stylizing photographic exposure in SketchRay
Artistically stylizing photographic exposure in SketchRay
This tutorial will show you how to use SketchRay's stylize filters and brightness/contrast controls to artistically transform the exposure of a photograph. Below are the before and after images for this tutorial. You can right click (windows) or ctrl-click (mac) on either of these images to download them at full resolution.
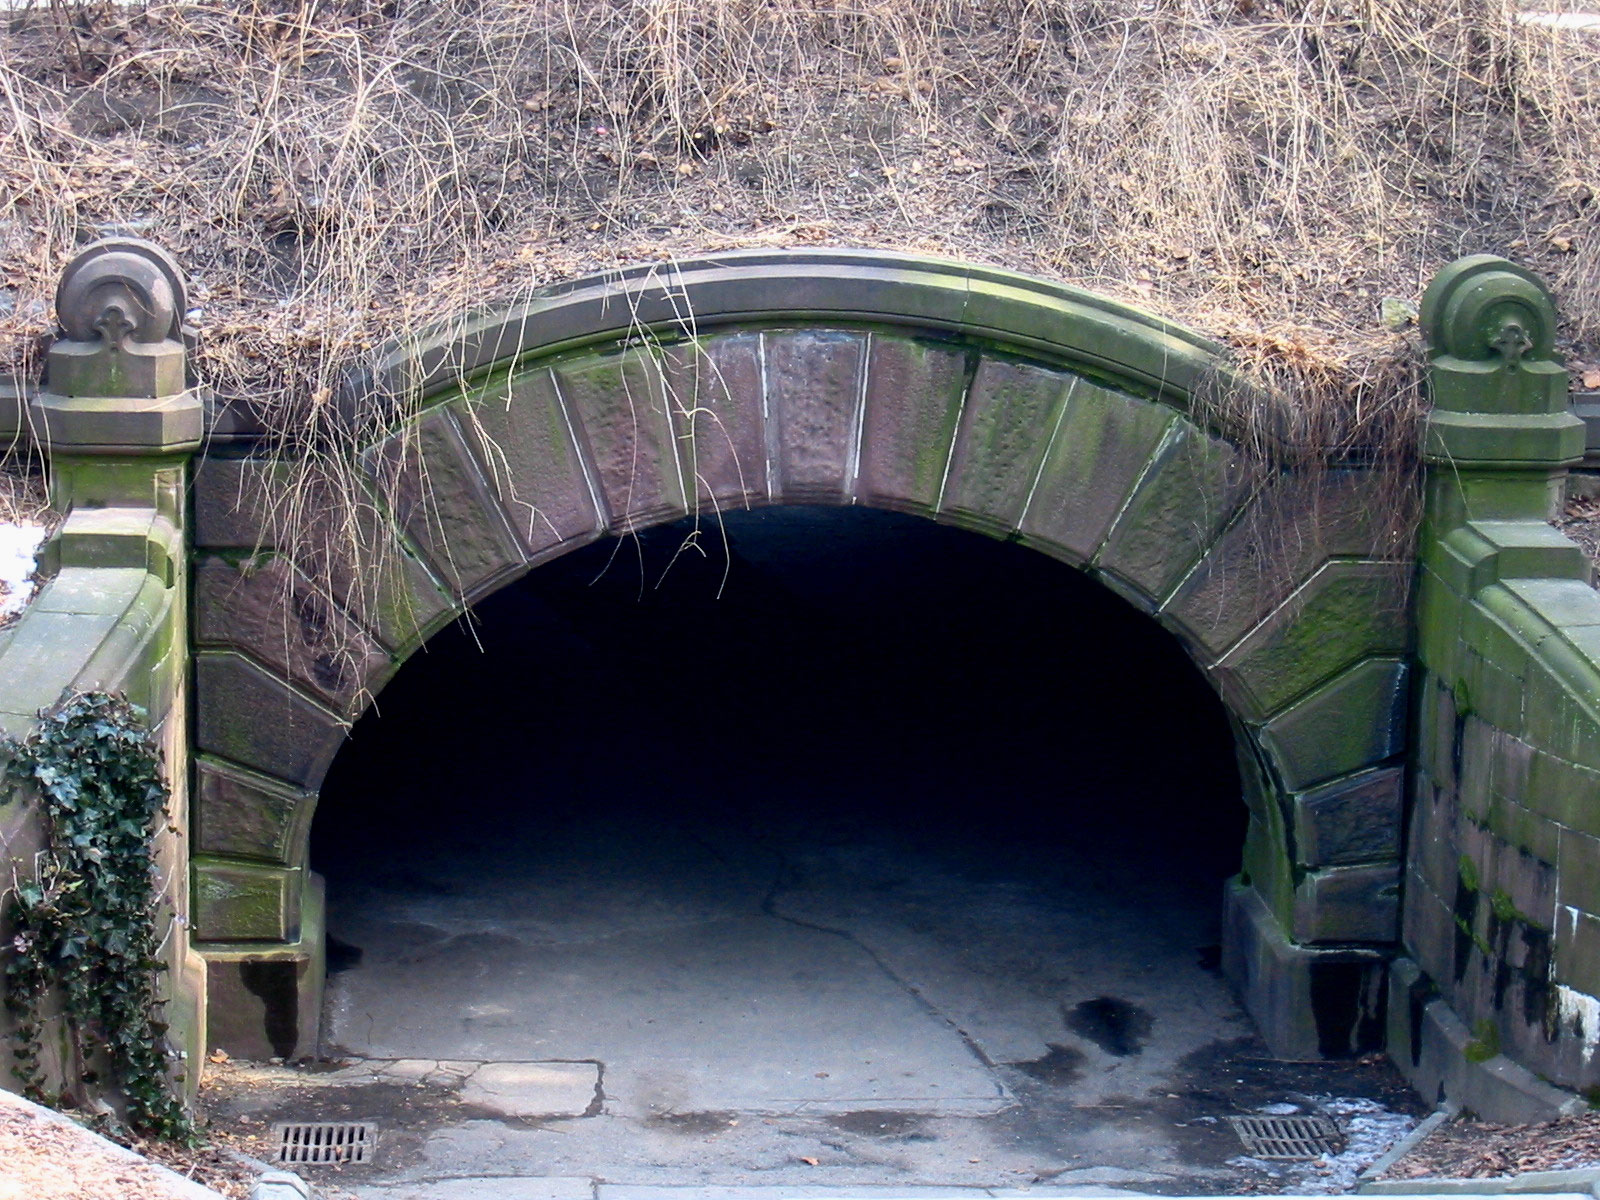
Before |
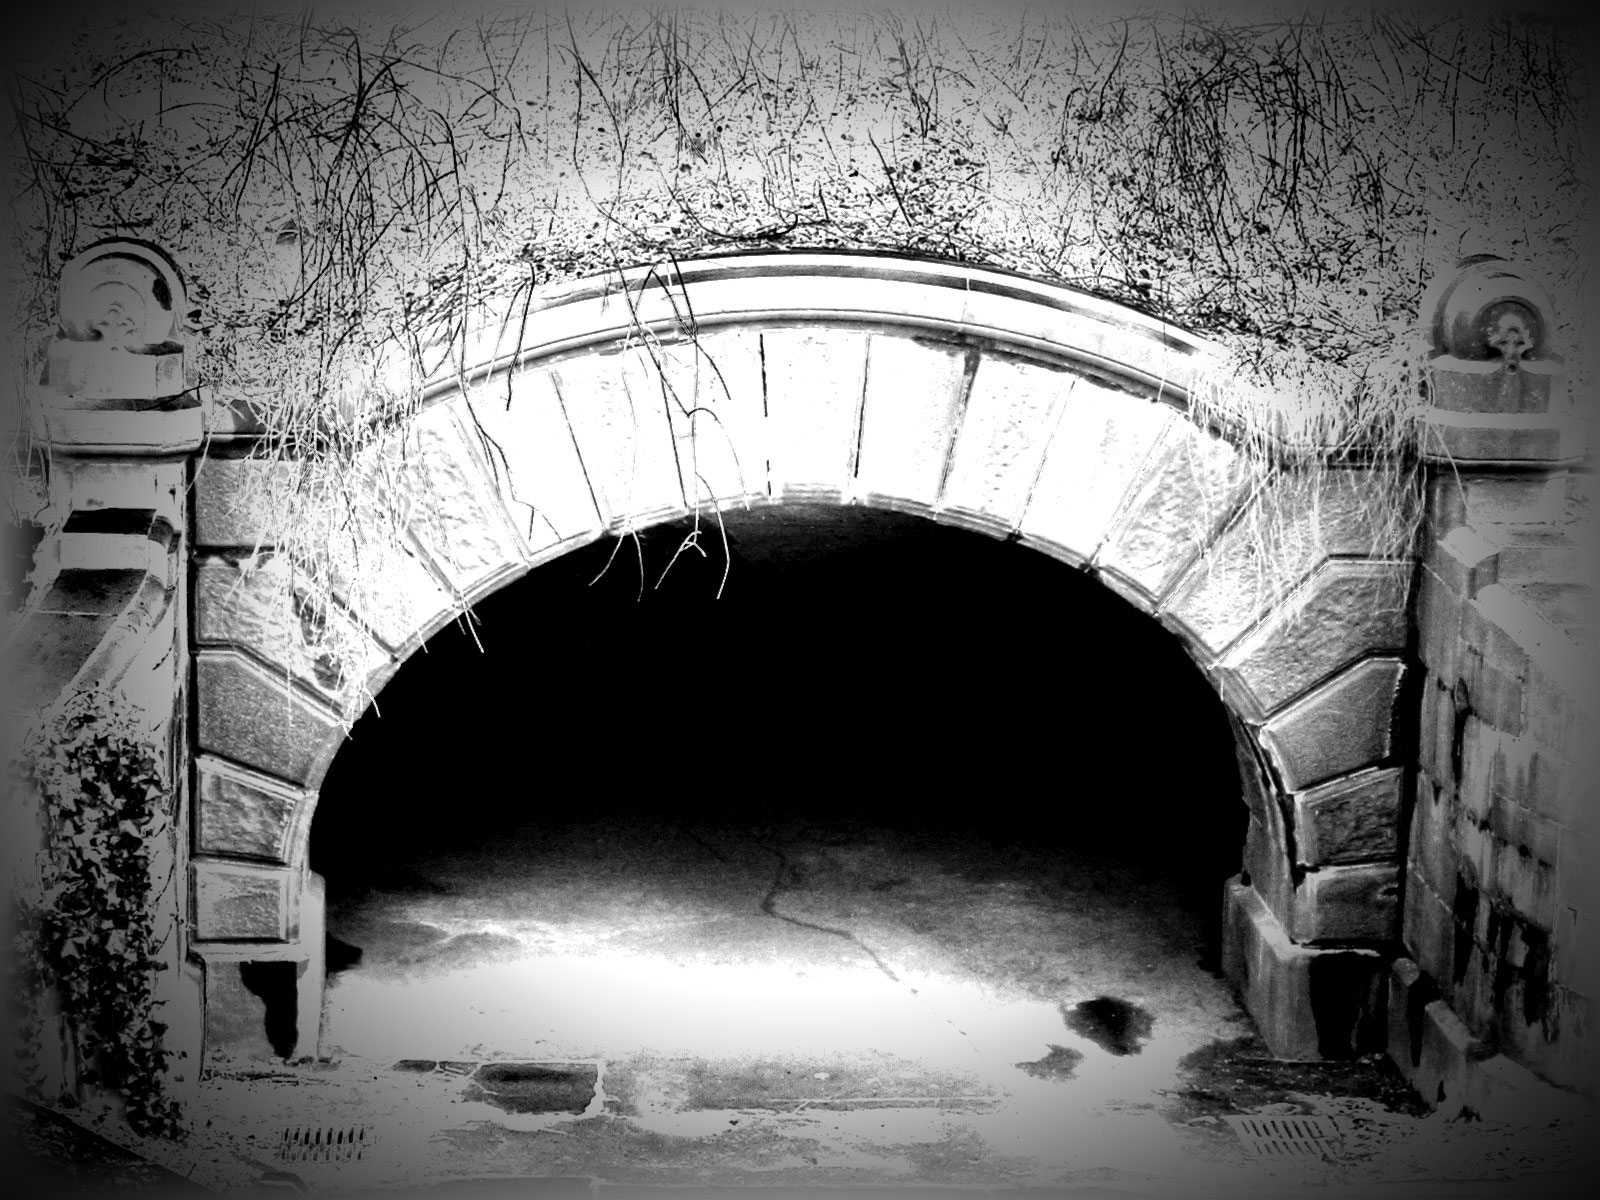
After |
|
Step 1
Start by opening the photo you want to transform. You can use your own photograph or experiment with the starting photo shown here.|
|
|
|
Step 2
The first exposure stylization we will do is solarization, an effect created in film photography by exposing the film briefly to light during development. It turns the more highly exposed areas of the photo into the photo negative. Choose the Solarize filter.|
|
|
|
Step 3
After solarization.|
|
|
|
Step 4
Next we'll convert the photo to black and white. Select the Custom Grayscale filter.|
|
|
|
Step 5
Select the amount that the red, green, and blue components of the image contribute to the black and white imge.|
|
|
|
Step 6
After converting the image to black and white with the Custom Grayscale filter.|
|
|
|
Step 7
Now we'll use the brightness/contrast controls to overexpose parts of the photo. Choose Adjust Brightness/Contrast from the Image menu.|
|
|
|
Step 8
The brightness/contrast adjustment dialog will appear.|
|
|
|
Step 9
Increase both the brightness and contrast to blow out the exposure in the brightest parts of the photograph while keeping the darkest parts of the image dark.|
|
|
|
Step 10
After adjusting the brightness and contrast.|
|
|
|
Step 11
Next we'll fade just the edges of the photo to white in a rectangular pattern. Choose the Soft Edges filter.|
|
|
|
Step 12
Here's the effect of applying the Soft Edges filter.|
|
|
|
Step 13
Next we'll darken the edges in an oval pattern. Choose the Burnt Edges filter.|
|
|
|
Step 14
Here's the effect of applying the Burnt Edges filter. I'd like to darken the edges a bit more. We could run the Burt Edges filter again, but the Vignette filter gives finer control over this effect.|
|
|
|
Step 15
Choose the Vignette filter.|
|
|
|
Step 16
Set the options on the vignette filter to create the vignette effect you would like. The options dialog allows you to create anything from a very subtle to a very pronounced vignette effect. Here we'll create a fairly subtle vignette effect.|
|
|
|
Step 17
After applying the Vignette filter.|
|
|
|
Step 18
The large increase in contrast can leave some slightly jagged edges between very dark and very light areas in the image. Choose the Smooth Edges filter to smooth out any jagged pixels.|
|
|
|
Step 19
After applying the Smooth Edges filter.|
|
|
|
And here's the final image...
|
|
|